Friday, May 29, 2015

Of Birds, Bees and Apple Trees

It has been an active spring season on the homestead, and this post is the resulting "grab bag" of topics.  Last year I had made a commitment to myself to put up a couple of nest boxes, in hopes of convincing a pair of tree nesting ducks to stay, as opposed to passing through on migration as they did last year.  Perhaps it was a bit too late, but I did in fact build and install two nest boxes.

Everything I purchased for the project is pictured (L); 12 feet of 1 in. x 10 in.
cedar board, cut in half at the lumber yard, a roll 25 foot roll of 2 foot wide
aluminum flashing, and a box of 50 stainless steel deck screws; the
instructions are from Ducks Unlimited.  In the second picture (R) the boards
have been cut to length using the Skillsaw.  Not pictured are a few roofing
nails for attaching the flashing to the tree, two big nails for mounting the box,
and some 1/2 in. hardware cloth, all of which I had on hand.
As projects go, this one is simple and easy.  Simple in that the design of the box is simple, and in that little material and few tools are required.  Once I had the materials and tools assembled, it probably took me less than three hours to build and install both boxes; most of that time was spent building the first box.

Of course much tree duck habitat has been removed to make way for development or agriculture, but the biggest reason for providing nest boxes is to protect the ducklings from predators.  One study I read [1] put duckling survival rates at about 35%.  "Of the total number of ducklings produced, about 65% (11 l/171) were lost and over 68% (76/l 11) of all duckling mortality resulted from the loss of entire broods."  The loss of entire broods was attributed solely to predation, specifically to mink predation.  Yes, this study looked at Mallard ducklings, which nest on the ground, not tree ducks.
Left (L) image shows hardware cloth that allows ducklings to climb to the
entrance, and the 4-1/2 in. wide by 3-1/2 inch tall entrance hole. The image on
the right (R) shows the box mounted on a maple tree, with the predator guard
in place below the box.
A second study [2], this one of Wood Ducks, indicated that the "overall survival of ducklings only ranged from 15-28%," though this study was made in Mississippi, so it too is perhaps a bit "weak" as an indicator of duckling survival rates in Michigan.  Later in the paper: "By now, you are probably wondering what was responsible for the relatively low survival of ducklings? The answer was PREDATION!"  From my point of view it seems safe to say that duckling mortality is high, something close to 65% - 70%, and that protection from predators can improve the survival rate.

Another first this spring was grafting.  The cleared area around the house has on its perimeter approximately 25 crab apple trees, which are well established and date, I am guessing, to the early 70's when the house was built.
Left to Right, cutting through the outer and inner bark to the cambium
layer (L); the bark has been "slipped" at the cambium layer and the prepared
scion inserted (C); and finally the wound has been protected with grafting
compound and the branch wrapped with grafting tape (R)
The deer love the crab apples, though the same cannot be said by any humans I know.  Fruit trees have been a part of the plan since the earliest days, and grafting apple scion onto established root stock is one of the quickest ways to a harvest of eating-apples; 2-3 years or so.  I used Tanglefoot 300000529 1-Pint Tree Wound Pruning Sealer and Grafting Compound and Parafilm® Grafting Tape (Genuine by Parafilm®) 90' Roll Clear (1" - One Inch).  I chose Honeycrisp and Winesap apple varieties for this experiment, and am now putting a frequent eye on the scion for growth; it felt right, but we shall see. <Leafing out of some scion was seen on 16 May and growth continues.>

And finally, on the "sad news" front, there is the condition of our sole remaining colony of bees.  When the temperatures were peaking at over 50 degrees F in mid-April, and no bees were flying, I decided to go into the hive.  What I found was certainly not what I had been hoping for all winter.
A mouse or a vole had taken up residence in the hive.

Dead bees preserved in time at the top of the hive.  There was
no honey in the hive; they either starved or were chilled,
or more likely some combination of the two.
It was a complete mess, as the picture at left attests.  Some sort of small rodent had taken up residence, and of course destroyed most of the comb in the process.  Even in the comb that was still intact, there was no honey.  I am not a specialist in failed hive forensics, but I believe the colony had failed and all of the bees had died before the squatter showed up to stay.  In the first part of June last year, with only two boxes on the hive since installation of the colony in mid-April, I checked to see how much comb the colony had built out.  Sure enough, they had built comb all the way to the bottom of the lower box; I felt lucky to have been just in time in adding boxes to make more room before the colony swarmed.  This was documented in the 18 June 2014 post entitled, "Late Spring Update from the Homestead, Part III, Beekeeping."  As I took the hive apart this spring though, it was perfectly clear that the bees had built no additional comb in boxes three or four, none, since the end of the first week of June.  What happened I do not know.  Is this what "colony collapse disorder" looks like?  I cannot speak to that.  Regardless of the reason why, I do not think that two boxes would hold enough food stores to get the colony through the long Michigan winter.

I went 0 for 3 in 2014; three colonies installed, zero survived to spring of 2015.  The list of mistakes I made at colony install in 2014 is long.  In mid-May of 2015 I installed two new colonies, and benefiting from the failure documented here, and from additional research, it seems we are enjoying at least more early success than last year.

More will be posted on the 2015 grafting and bee installation in a future post.

Thank you for reading and commenting on the blog.  Your comments and criticisms, your inputs and acknowledgements, are welcomed, and will help me to improve my posts.

 Please "follow" the blog by clicking on "g+ Follow," or by e-mail at  "Follow by Email."   Also, "Like" us on Facebook at www.facebook.com/swmichiganhomestead.

-- John, 29 May 2015

[1] "Survival of Mallard Broods in South-Central North Dakota," http://digitalcommons.unl.edu/cgi/viewcontent.cgi?article=1050&context=usgsnpwrc, accessed 24 April, 2015
[2] "Wood Duck Broods in Dixie:  Striving to Survive Early Life," http://www.fwrc.msstate.edu/pubs/ducklings.pdf, accessed 24 April, 2015

Tuesday, March 3, 2015

It is Tapping Time, And That Means Spring!

Here we go, in southwest Michigan!  The 10-day forecast includes what appears to be an almost picture perfect start to the maple sugaring season.

10-day weather forecast for Kalamazoo, Michigan
Starting on Saturday, 7 March, you can see that the daily high and low temperatures will bracket the freezing point for six days in a row; that dynamic is what causes maple trees to develop a positive pressure when the temperature rises above freezing, pushing sap out of the tree.  I will plan to tap at least some of our trees on the morning of Saturday 7 March, and I would bet that they will start flowing that afternoon.

A call to the Kalamazoo Nature Center revealed that as part of previously scheduled public events, they have already tapped their maple trees.  Based on what I have seen the weather doing in recent weeks, we have not missed much, if any, of the season.

This year we are planning to scale up the operation, from 13 taps to 20 taps, still a small operation by most measurements.  For more information on the process you can read my previous posts on the subject:

Very Early Spring 2014 - Tapping the Sugar Maples!
Very Early Spring 2014 - Sugaring! Part II of Tapping the Sugar Maples!

For those of you in southwest Michigan, you might want to check out Dodd's Sugar Shack in Niles (no web presence), call Don at 269-683-3283; they have some new and used equipment available.  Or try Sugar Bush Supply Co. in Mason, MI, at 517-349-5185.  You can also find equipment on eBay, in fact I just found 10 used buckets with lids and spiles there, at a very good price.

There are all sorts of ways to get started inexpensively, using materials you might have around you, like wire, piping (PVC, PEX, copper, etc.), and empty milk jugs, for example.  The most commonly tapped maples are Sugar, Black, Red and Silver, according to Tap My Trees.  Get out there and have some fun on a small scale; you will not regret it!

Thanks for reading, and keep us posted on your progress!

-- John, 03 March 2015

Tuesday, February 24, 2015

Top 7 Messages from The Land Ethic Reclaimed MOOC

Perhaps as I did, you might ask, "what is a MOOC?"  According to Oxford Dictionaries [1]:

Pronunciation: /mook/
Definition of MOOC in English:

NOUN
A course of study made available over the Internet without charge to a very large number of people:  'anyone who decides to take a MOOC simply logs on to the website and signs up'

ORIGIN
early 21st century: from massive open online course, probably influenced by MMOG and MMORPG.

My homepage in the Coursera iPad app
I believe I owe a debt of gratitude to Mary C., and the Van-Kal Permaculture Facebook page, for the lead to this treasure trove.  I am sure there are other sources, but this particular course was offered through Coursera, so I signed up on-line and also downloaded the app for my iPad.   There are many course offerings from a large number of prestigious institutions, accessible by browsing or searching the course catalog.

As you can see on my Coursera homepage, since completing the Land Ethic course, I have signed up for three others:

The Coursera course catalog and search tool
-- Changing Weather and Climate in the Great Lakes Region, University of Wisconsin-Madison, Madison, Wisconsin, USA
-- Forests and Humans: From the Midwest to Madagascar, University of Wisconsin-Madison, Madison, Wisconsin, USA
-- Chicken Behaviour and Welfare, The University of Edinburgh, Edinburgh, United Kingdom

It seems like there is something available for everyone, and it is all free!

Now then, let us get back to a discussion of the Land Ethic course in particular, and the Top 7 Messages that I took from the course.  The curriculum spanned 4 weeks, new topics starting on successive Mondays.  Each week included several short videos in the 2 to 15 minute range, a few selected texts from 2 to 27 pages in length, "Hands-On Learning" and "On Your Own" activities, and, if you signed up to receive a "Statement of Accomplishment," which I did, a short Quiz (mulitple choice and true/false) of 7 or 8 questions.  There was also a "Discussion Forum" available for making comments and asking questions of fellow students.  I watched all of the videos, read all of the texts, and successfully completed all of the quizzes; I was less diligent in completing all of the Hands On and On Your Own activities, though I got better at that as the course progressed.  I would estimate that the course required of me two hours per week, on average.

Top 7 Messages

1  Who was Aldo Leopold?  From the opening two paragraphs of the Aldo Leopold wikipedia entry[2]:

"Aldo Leopold (January 11, 1887 – April 21, 1948) was an American author, scientist, ecologist, forester, conservationist, and environmentalist. He was a professor at the University of Wisconsin and is best known for his book A Sand County Almanac (1949), which has sold more than two million copies.

Leopold was influential in the development of modern environmental ethics and in the movement for wilderness conservation. His ethics of nature and wildlife preservation had a profound impact on the environmental movement, with his ecocentric or holistic ethics regarding land.  He emphasized biodiversity and ecology and was a founder of the science of wildlife management."

2  What is the "Land Ethic?"  According to Leopold in "The Land Ethic," from A Sand County Almanac[3]: “A thing is right when it tends to preserve the integrity, stability, and beauty of the biotic community. It is wrong when it tends otherwise.”  There was discussion in the assigned media that perhaps the phrase "integrity, stability and beauty" could be replaced by the word "diversity" alone, though I think that is a bit of a stretch.  The word "stability" could perhaps be replaced by "resilience," as it seems all too often conservationists have done more harm than good in their attempts to stabilize natural environments, the control of forest fires in the mountain west comes to mind.  Still, I think Leopold put it quite well, and there really is little need to modify his wording.

3  What is the "North American Model" of conservation?  According to the instructional materials, Week 1 Take Aways, "There are seven principal characteristics that together define the way that public wildlife conservation occurs under North American democratic governance. These are:
  • Wildlife Resources Are a Public Trust
  • Markets for Game Are Eliminated
  • Allocation of Wildlife Is by Law
  • Wildlife Can Be Killed Only for a Legitimate Purpose
  • Wildlife Is Considered an International Resource
  • Science Is the Proper Tool to Discharge Wildlife Policy
  • Democracy of Hunting Is Standard"
Again according to the instructional materials, this "sets Canada and the U.S. apart from many other nations where the opportunity to hunt is restricted to those who have special status, such as land ownership, wealth, or other privileges."

4  Hunting is now necessary for management of herbivory, which is to say that hunting is necessary to manage the impact of large herbivores, like White-Tailed Deer and Elk, on ecosystems.  In Wisconsin in the first half of the 19th century, large predators including the Wolf, Wolverine, and Cougar, together with Indians, helped to control the populations of Elk, Woodland Caribou and White-Tailed Deer.  At that time, the population density of White-Tailed Deer is estimated to have been 5-10 animals/sq. mile.  Logging, clear-cutting in particular after European settlement, opened up vast tracks of land to regrowth and formed edge habitat, favoring deer, while at the same time predators were largely extirpated, and hunting seasons were shortened to as little as 9 days in this example, Wisconsin.  Deer population densities rose to as high as 40-50 animals/sq. mile, and they became so-called "keystone herbivores."  The impact of high deer densities on plant diversity has been shown to persist for a half century or more.  Data exist from the 1940's and 50's that allowed researchers to measurably establish the impact of deer on plant diversity between then and the first decade of the 2000's:  On hunted lands in studied areas 10% of plant diversity was lost over the next half century, while on unhunted lands a 30% reduction was measured, and in state parks 50% of plant diversity was lost.  Conversely, on Indian reservations plant diversity slightly increased during the same time frame.  More generally there has been a change in the landscape of at least 40% since the 1950's, and by studying tree seedling numbers, islands with and without deer, fenced "exclosures," and 50-year changes, the researchers have concluded that substantially all of the change was due to deer over-abundance.

5  Deer management is problematic.  While the science of managing the size of a deer population seems to me to be pretty well defined, it is counter-intuitive to some I can imagine, and with others it may not even be agreed upon in the scientific sense.  In the case of a conversation between hunters and managers what we seem to have here is at best merely a failure to communicate, effectively, as conflict arises regarding the desired size of the herd, the size of the hunt, the consist of the hunt (buck and/or doe numbers), etc.  No doubt there could be an argument as to the "carrying capacity" of the land in question, which if established then according to the science sets the population level (1/2 carrying capacity) at which maximum herd growth rate occurs, which would also be the herd size resulting in the maximum sustainable harvest.  Oh, and lets not forget the real and perceived impact of re-introducing native non-human predators to the mix.  Worse yet, in a conversation including anti-hunters, there is I suppose a problem of convincing them that the impact of over-abundant deer is a problem in the first place, or that there is such a thing as an "over-abundance of deer," not to mention a problem of convincing them that hunting is a part of the solution to a problem that they may or may not agree exists!  Sprinkle some politics and a little money on top for good measure and there is likely a level of "excitement" in the management process that I would not personally be willing to tolerate.

6  Private lands and farmers are key to wildlife conservation.  Take "deer management is problematic" and put it on steroids; there you have it.  Private lands and the potential for attendant hunting restrictions disabling herd management; the intersection of wildlife as a "public trust" and private property rights in general; the possibility of private landowners legally limiting access to public property that is isolated/surrounded by private property; offsite/remote, disinterested, willfully ignorant, or simply ignorant though well-intentioned landowners, etc.  What could go wrong?  In  the face of all that, and more, Leopold conducted the successful experiment that was the "Riley Game Cooperative," with farmers and fellow sportsmen.  The course used Montana as another example, and the challenges of managing the Elk heard that migrates from within Yellowstone National Park, to large swaths of privately held land outside the park.  It is necessary for effective wildlife management that private landowners and farmers are positively engaged in the process, especially so in the eastern 2/3rds of the country it seems to me, where privately held lands dominate the landscape.

7  Among hunters, the divide between the traditional hunters and the so-called "green hunters" must be bridged, and bridging the gap presents a huge opportunity.  Hunting is seen by some in the green camp as an ethical alternative to the industrial food systems, specifically in view of the lack ethical treatment of animals in the industrial systems.  And, perhaps concern about their personal health has led them to a strong desire for lean and clean meats.  Also, hunting could be seen as an extension of the "locavore" movement; some have come to think that if they are going to eat meat, and they want to know where their food comes from, then it is logical to conclude that they should kill their own meat, taking ownership of that process.

From the green end of the hunter spectrum, the other end is sometimes seen as the tobacca' chewin' animal abusin' red neck end of the spectrum.  In my experience that is a ill-fitting stereotype, a stereotype though that will only be broken when the two ends of the spectrum are brought into close relationship with each other.  (It comes to my mind that the same is true of our polarized politics, at least at a national level.)  The onus is on the community of traditional hunters in my opinion, to engage the "green hunting" element, to share with them, to give them the benefit of their experience, and to help them to scale the many, potentially time-consuming, and sometimes expensive, barriers to entry into the firmament of successful hunters.  I find myself somewhere near the center of the spectrum, having been absent from the hunting scene for over 20 years, and having been brought back to it through a strong desire to be more self-reliant, and healthier, sustainably.  And fortunately, I have had the benefit of the time and experience of long-time traditional hunters in my reintroduction.

In summary, management of wildlife is clearly much more difficult than I had assumed.  Of course it make sense now that I have been exposed to at least some of the factors in play, but it is disappointing that even though I recognize that I know a lot less than I do not know, I still walk around inside my life with massive blind spots.  It is humbling to say the least.

The course was a great introduction into MOOCs, to which I had had no exposure, and it was a great overview of wildlife management in North America.  I highly recommend the course.  Coursera too, seemed to be a great provider of the service; their iPad app worked flawlessly.

By way of furthering my education on this subject, I added to my reading list a couple of books that were cited in the course:

White-Tailed Deer: Ecology and Management, by Lowell K. Halls

Thank you for reading and commenting on the blog.  Your comments and criticisms, your inputs and acknowledgements, are welcomed, and will help me to improve my posts.  I am learning, too.

 Please "follow" the blog by clicking on "g+ Follow," or by e-mail at  "Follow by Email."   Also, "Like" us on Facebook at www.facebook.com/swmichiganhomestead.

-- John, 24 February 2015
www.swmichiganhomestead.blogspot.com

Resources:

Coursera:  https://www.coursera.org/
University of Wisconsin-Madison MOOCs: https://www.coursera.org/wisconsin
The Land Ethic Reclaimed MOOC: https://www.coursera.org/course/perceptivehunting

End-notes:

[1] MOOC. Oxford Dictionaries. Oxford University Press. http://www.oxforddictionaries.com/us/definition/american_english/MOOC (accessed February 23, 2015).
[2] "Aldo Leopold." Wikipedia: The Free Encyclopedia. Wikimedia Foundation, Inc. 24 January 2014. Web. 23 February 2015. <http://en.wikipedia.org/wiki/Aldo_Leopold>
[3] A Sand County Almanac (Outdoor Essays & Reflections), by Aldo Leopold (1989) “The Land Ethic” pp. 201-226. Copyright 1989 Oxford University Press. 


Monday, February 9, 2015

Insulating Can Lights: The Rest of the Story

In my post of 4 February 2015, I discussed "energy leaks," and specifically leaks that I thought were due to air flow through "can light" fixtures that penetrated the ceiling of the kitchen and floor of the attic.  I noted at the time, "The only break in the insulation envelope, is a pair of can lights above the kitchen counter, their location corresponding to the left (west) edge of the heat shadow on the roof."  A "small and slow improvement" was made, which was basically to add more fiberglass batt insulation on top of the can lights.  The folly of this effort was soon in evidence, as after a more recent snowfall I could again see a "heat shadow" forming on the roof in the same location.  Fortunately, my friend Sam saw the post, and gave me some good advice:   "As for your fiberglass experiment over the recessed lighting. In my experience the air flow through fiberglass batts make excellent air filters and not much else.  Recessed lighting is notorious for being leaky devices that as you rightly state let the warm conditioned air of your living space into the unconditioned space of your attic.  Fiberglass loses its insulative capacity and is short circuited by air flow, so if it is not installed in a situation where there are an air barriers the R-value is decreased.  You might want to try recessed lighting insulation covers (yes, they are a thing) and then place the insulation over the top of those.  The covers allow you to seal around the light and reduce the air exchange going on with the hole in your ceiling."  Indeed!  And thank you Sam!

Kitchen attic and fiberglass batt insulation over can lights (left), and close-up
of can lights (right)
I picked up some Insulmax CanCaps at Menards; I surely could have rigged up a homemade solution, but I was concerned about matching the "Class A fire retardant" rating (850 deg F) of the CanCaps, and at $15 each, I decided to take the surer, and easier, route.

It is marketing material to be sure, but on the label of each CanCap is the statement, "Over 2.6 Million cubic feet of air and humidity flow in and out of ONE recessed light fixture in a single year.  To give you an idea of how big that is... you could fill the entire Houston Astrodome with the air transfer of only 6 light cans in less than 3 years!"

I am not sure about you, but I would rather not be cutting that much firewood!

CanCaps, cut to fit, with special adhesive (left), and fitted in attic space
before application of adhesive (right)
In the pictures you can see that some fitting was required, and so the gaps between the caps and the floor joist and roof rafter must be filled.  Loctite PL300 Foamboard Construction Adhesive was used, which will not "eat" the foam that the CanCaps are made of.  Probably most difficult was the fitting of the CanCap nearest the eave in both pictures, between the roof rafter (2 x 12 in.) and the floor joist (2 x 6 in.), and ensuring that the joints were sealed completely with construction adhesive.  No doubt I could have used less adhesive had I been more experienced; as it was I went through the entire tube of adhesive to seal and secure these two CanCaps.

Construction adhesive "seal" in place
Remaining then was to notch the CanCap covers to allow for entry and exit of wiring, and to install the covers.  The penetrations for the wiring were also sealed using the foam board construction adhesive.  Finally, I re-installed the R-19 fiberglass batt insulation around and above the caps.  The CanCaps have a R-Value of 4.35.

There were two other light cans penetrating the attic floor, in the main section of the attic; those cans were also covered with CanCaps, although no "fitting" was required.

CanCap installation complete (left), fiberglass batt re-installed (right)
I have not performed any calculations, but it seems likely that the number of BTU's being lost from the house through microwave vents, bathroom vents and can lights, is significant; in each instance there is in effect, an open hole between the climate-controlled interior of the house and the outdoors.  Since the future includes heating the home with wood burning stove(s) and a outdoor wood boiler (OWB), avoiding unnecessary heat loss is a top priority.

Thank you for reading and commenting on the blog.  Your comments and criticisms, your inputs and acknowledgements, are welcomed, and will help me to improve my posts.  I am learning, too.

 Please "follow" the blog by clicking on "g+ Follow," or by e-mail at  "Follow by Email."   Also, "Like" us on Facebook at www.facebook.com/swmichiganhomestead.

-- John, 09 February 2015
www.swmichiganhomestead.blogspot.com

Wednesday, February 4, 2015

Winter 2014/2015 - Work in the Woods, Hunting, and Planning

The forest in snow
Winter is hard, though perhaps not always in the sense you would at first imagine.  In one sense, there is of course the weather, but I rather enjoy winter, absent the freezing pipes of winter 2013/2014, and the aftermath.  I spent all too many hours under the house replacing the plumbing.  In terms of the variety of the work there is to do, there is less in winter it seems; there is no gardening going on, the bees do not require any management, no maintenance of other plantings, and so on.
Temperatures have been relatively mild compared to last year, so there has been no ice fishing, yet.  There have really only been three activities calling for my time and energy; hunting, wood harvesting, and 2015 planning.

Decanting the last of 2014's maple syrup
I did winterize the wood chipper and the lawn tractor, which boiled down to ensuring that the carburetor's are dry, so that I do not have to deal with fuel issues in the spring.  We processed 40 gallons of maple sap that we had stored in our chest freezer from last year, yielding 14 cups of syrup.  The Lewis Winch was commissioned.  Put up a couple of cords of firewood.  Attended a Round Pole Building workshop, two days, at Straw Bale Studio, in Oxford, Michigan, and learned a new skill I intend to put to use later this year.  And, there is a plan to attend a two-day blacksmithing workshop at Tillers International this winter; another skill to eventually be put to good use.  I suppose I could add a fourth activity to the list of what goes on in winter, that being "continuing education."  And lest I forget, the lights on the utility trailer were replaced.

Still, there is much less going on than in spring, summer and fall, or so I thought until writing this post!

The Lewis Winch, primarily to be used for log skidding
Trailer lighting made road-worthy
Sadly, and somewhat embarrassingly, I must admit that it was another unproductive white tail deer season.  We saw plenty of deer on trail cameras, before the season opened, and a friend took a buck from our property, but I saw very few from my stands, and took only one shot.  I missed.  No excuse, Sir.  I have done more scouting this year though, met more hunters in the area, and I think I will be much better prepared for the 2015/2016 season; now having a much better idea of deer behavior patterns on the property.  It was hard to sit in the stand so often, for so long, and so unproductively, when knowing of other endeavors that are predictably more productive uses of my time.  Hunting will be productive, though to be sure my results have been anything but predictable or productive.  I did have some amazing experiences in the stands.  On one early morning hunt, about a half hour before sunrise, I could start to make out several turkeys in trees near me.  Within only a few minutes of sunrise, six of them glided down from their perches and began to forage.  It was simply amazing to watch turkeys waking up and going about their daily activity.  That evening, from the same stand, as sunset approached I could see several turkeys moving towards me.  Sure enough, as if by mechanical clockwork, at sunset they took flight for their perches, again six, one by one.  An hour or so later I walked home, passing immediately beneath them in near complete darkness, and they did not move or make any sound.  It was awesome.  It is hard to put words to the experience of such abundance.

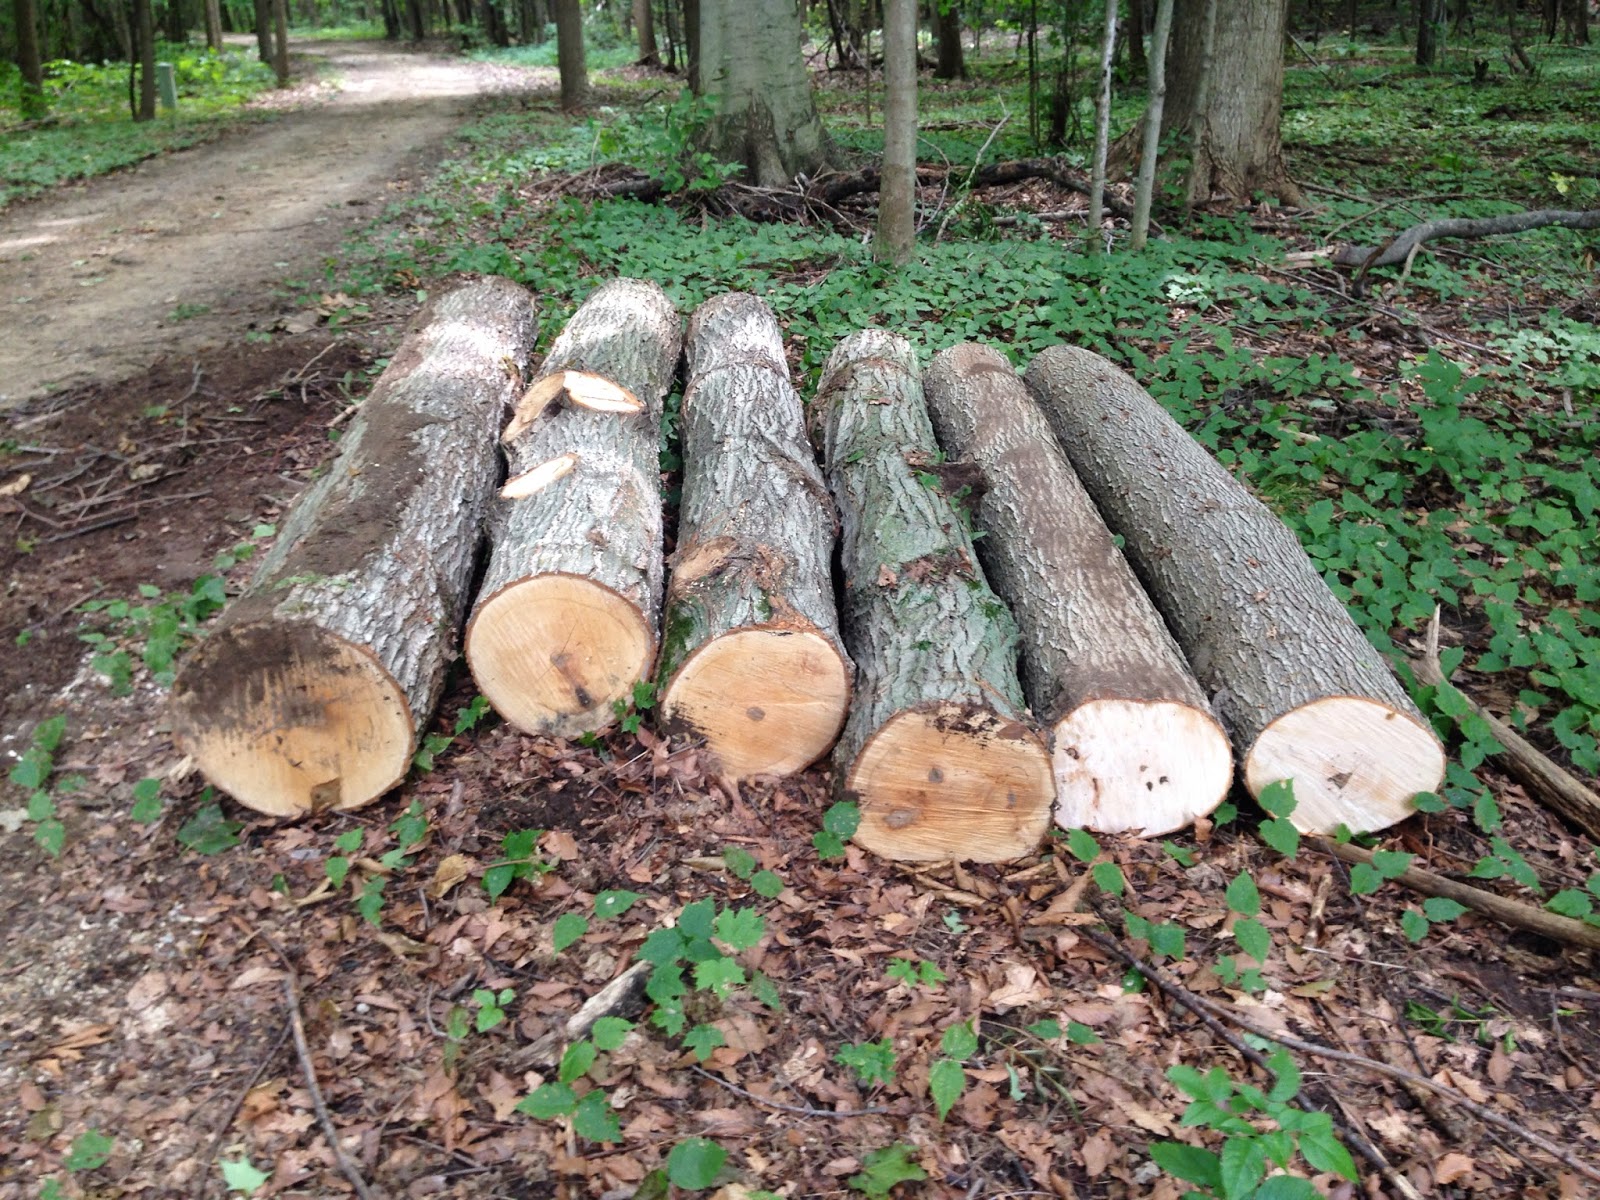
The sugar maple harvest for the wood floors continues.  I have only taken down three trees that were not already brought down by storms, or that had not been severely storm damaged.  Those three have been taken from a location that is being cleared for the sugar shack (outdoor kitchen) at the top of the property.  Arguably I could have made much quicker work of putting 2,800 board feet of lumber on the ground, but I now have this nasty habit of cleaning up after myself, and it takes quite a bit of time to process the major limbs into firewood, smaller branches into wood chips, and twigs and leaves into compost.  Simply leaving the tops on the ground, would lead to much quicker progress.  As it is, there are two or three 8 foot logs ready to skid to the pick-up area, and another large, downed sugar maple that needs to be cut to 8 foot lengths, and the logs skidded before pick-up.  The first pick-up by the saw mill is tentatively scheduled towards the end of the first week in February.  When pick-up is complete, approximately half of the necessary logs will be in process at the mill.  Two or three more trees are already tagged for felling.

And finally, there is the planning for the spring of 2015 and beyond.  The first principle of permaculture is to "observe and interact," and as we have done so in our first 18 months on the property, a few items on "the list" have risen to the top.  Among those at the top are: 1) reducing the cost of energy; and reducing our dependence on external sources energy, for heating the home; 2) a workshop, as an enabler of greater self-sufficiency and homestead improvement projects (vehicle, boat, machine, and building maintenance, woodworking, blacksmithing, etc.); 3) expansion of perennial food crop production; and 4), collect and manage rain water and runoff.  Further, if I can find any way to make it happen, I would add to that list an outdoor kitchen for maple sap evaporation and syrup bottling, butchering and food preservation (canning, dehydrating, etc.), and a root cellar.  So, what does that mean, specifically?  Well, here was my first pass at what I would do in 2015:  "It means building and equipping a workshop, installing an outdoor wood boiler (OWB) and associated equipment to heat the house and potable hot water, collecting and storing rainwater run-off from buildings, installing a diversion dam/swale to manage the run-off on the hill south of the house, and pruning and grafting onto existing crab apple trees to provide for edible apple production in coming years."  Then, a wave of self-imposed austerity came over me, in a good way, I only grudgingly admit.  As a result, another permaculture principle will be applied, that of using "small and slow solutions."  The austerity-constrained plan includes:  1)  Perennial food crop production will be expanded as planned, and will likely include the installation of some fruit-bearing shrubs and trees, and grafting apple scion onto established crab apple trees.  Being considered include grape vines, Paw Paw and Common Persimmon trees, Serviceberry and Black Elderberry shrubs, as well as some apple varieties' scion yet to be determined.  2) As also in the original plan, installing a diversion dam/swale to manage the run-off on the slope south of the house will be accomplished.  Both 1) and 2) are relatively low-capital improvements.  Instead of "building and equipping a workshop," we intend to 3), build a garden shed to store gardening equipment, and possibly to build a small boat house for storing any and all small watercraft and associated equipment.  Both of these DIY projects will free up space in the existing 2-car garage, allowing that space to be used for "vehicle, boat, machine, and building maintenance, <and> woodworking," but probably not for blacksmithing.  The building projects will help me to develop my carpentry skills, which are sorely lacking.  Barring unforeseen circumstance, the OWB is being dropped from the 2015 plan; I will though continue to find and mitigate energy leaks from the home.

Speaking of energy leaks.  You might remember the post of 3 August 2014, where the build and installation of an insulated box over the attic ladder was documented.  Recently I saw another heat leak "shadow" on the roof, this one over the kitchen.  The fact that the snow cover is complete over the east end of the house, is testament to the effectiveness of the insulated box over the ladder, and frankly, to the existence of the ridge vent, which will allow some warm air to leave the attic, before it is able to melt the snow on the roof to a noticeable extent.
Snow melted creating "heat leak shadow" on the roof, directly over the kitchen
Upon further investigation, the insulation in the attic above the kitchen seems to be intact, and on par with the insulation over the east end of the house.  The only break in the insulation envelope, is a pair of can lights above the kitchen counter, their location corresponding to the left (west) edge of the heat shadow on the roof.  Also problematic, in the section of the attic above the kitchen, warm air rising has no access to the ridge vent, because the north wall of the kitchen ascends to the roof blocking its path, and because there is a 2 x 12 in. roof rafter at the east end of the attic over the kitchen, partially preventing air communication with the main attic space above the east end of the house.

The incandescent bulbs in the can lights were replaced with CFLs; that should have cut their heat output markedly.  Still, I do not think it is the heat from the lights that is the problem.  As with the microwave vent that I mentioned briefly in the 3 Aug 2014 post, I believe the cans are acting as a chimney of sorts, between the warmer house and the cooler attic.  Warm air is simply flowing through the receptacles and into the attic, 24 hours a day, 7 days a week.  Previously, last summer, I had removed the paper backing from fiberglass batt insulation, and laid it out over the can lights.  This past week, I added two layers of fiberglass batt insulation, with the paper baking; we shall see if that improves the situation.  Warm air flow from the house to the attic is the root cause, if I am right, so stopping that is the first priority.  Further down the list is to prevent the warm air that makes it to the attic from melting the snow on the roof, creating ice dams at the eves, and to that end the roof rafters over the kitchen could be modified slightly to allow for air passage to the east end of the attic, and ultimately to the ridge vent, I think.  One step, one "small and slow solution," at a time.  I will wait to see the impact of the additional insulation before taking further action.

Spring is very fast approaching,  I am anxious to get the flooring logs to the mill before the Maple sugaring season arrives; shortly thereafter it will be planting season!  Our garden planning, to include the perennials noted above, is also in progress.  This spring promises to be busier than last, and more productive, so I am very excited to see how the property develops.

Thank you for reading and commenting on the blog.  Your comments and criticisms, your inputs and acknowledgements, are welcomed, and will help me to improve my posts.  I am learning, too.

 Please "follow" the blog by clicking on "g+ Follow," or by e-mail at  "Follow by Email."   Also, "Like" us on Facebook at www.facebook.com/swmichiganhomestead.

-- John, 04 February 2015
www.swmichiganhomestead.blogspot.com

Thursday, October 23, 2014

Forest Products: Hard Maple Flooring

American hophornbeam for fencing
I have posted on more than one occasion, regarding the felling of trees, bucking and splitting to produce wood fuel, and chipping to produce mulch.  There is also American hophornbeam (aka ironwood, see under "Trees" on the Plants & Animals page) growing on the homestead, which makes great fence posts; I have perhaps 15 to 20 such posts air drying now.  Hophornbeam can also be used to make long bows and re-curve bows, which I intend to attempt in the future.  Of course maple syrup is another  forest product, and one we intend to expand our production of in the spring of 2015.  And the list goes on.

The first Sugar Maple felled with its intended
use as flooring.
The most ambitious forest products project yet started however, is to harvest sufficient Sugar Maple for the production of hardwood flooring for the house.  Geri and I looked at what I refer to as "manufactured hardwood flooring," because it consists basically of a thin hardwood veneer, which would allow the floor to be refinished once or twice, on an engineered wood substrate; these products ran from $5-$7 per square foot, plus installation.  We also looked at re-purposed barn wood, and again we found ourselves looking at $5-$7 per square foot before installation.
The home requires roughly 2,000 square feet of flooring, so before laying the product on the sub-floor we would be into the project for $10,000 to $14,000.  Beyond the numbers though, which I will admit resulted in sticker shock, it was simply the principle of the thing; buying wood flooring when I am living in 50 acres of old growth forest seemed to me to be inconsistent with the whole notion of homesteading.  Geri and I had a few conversations regarding the longer lead-time involved in doing it ourselves, though ultimately, the anticipated satisfaction of having done it ourselves, that pride of ownership, nay, the pride of actually crafted the flooring ourselves, won out.  And so, on 18 August, 2014, I felled the first Sugar Maple with the intention of using it for wood flooring.

As early as 25 June I was in conversation with a local sawmill, desiring to both understand the process and the cost of manufacturing our hardwood flooring, as fodder for our decision-making.  My notes from 30 June:

"Hi Chris,

details from our earlier phone conversations are below.  Please let me know if you agree.

$1,512.50 --  Mill 2,750 board feet of sugar maple @ $0.55/board ft (1 inch thick, 3-7 inches random widths)
   $151.25 -- 10% waste factor (Do I need this factor? I'm paying for the waste by paying to mill and dry 2,750 board feet and leaving with 2,475 board feet, it seems to me.  Help me understand.)
   $687.50 -- Kiln drying @ 0.25/board ft
$1,500.00 -- Planing (to 3/4 in thick, tongue & groove, no micro-chamfer, @ $50/hr, 30 hrs)
-----------
$3,851.25

Notes:
-- Calculate 20% loss from the log to floor (I should have about 200 sq ft left over)
-- Cut 16-26 inches diameter logs to between 4 ft and 8 ft 6 in long
-- Air dry, 3-5 wks (weather dependent)
-- 1100-1200 sq ft in the kiln, 3-4 wks, 2 batches
-- 1 wk for planing
-- 2 days milling
-- John would like to lend a hand in the process, if practical

Next Steps:
- John to research recommend max maple floor board width at the National Hardwood Flooring Assoc.
- John to get the logs cut and into position for milling
- John to measure moisture content of sub-floor"

The first logs, cut to the length of 8 ft. 6 in., ready for the mill
I am planning for the process to yield 2,200 square feet of 3/4 inch thick flooring, in random 3, 5, and 7 inch widths.  Assuming 20% waste, or loss, from log to floor, I need 2,750 board feet* of log on the ground; by my calculations I have about a fifth of that on the ground now.  I plan to participate in the milling, drying, and planing processes, as this type of work might provide a stream of income in the future.

*A "board foot" is 1 square foot, 1 inch thick, or 144 cu. in. of wood.  For example, a 3 in. wide (1/4 foot wide) floor board, 4 feet long, and 1 in. thick, is 1 board foot of wood.

At a high level, the process steps are as follows (estimated cumulative calendar weeks from start):

1) Mill the logs into boards of random 3, 5, and 7 inch widths, 1 inch thick, maximizing utilization (1 week)
2) Air dry the boards for 3 to 5 weeks, depending on the weather (4-6 weeks)
3) Kiln dry the logs in 2 batches, each requiring 3 to 4 weeks (10-14 weeks)
4) Plane the boards to 3/4 inch finished thickness, and add tongue and groove to long edges (11-15 weeks)

Per square foot, before finish and installation, the cost is estimated to be $3,851.25/2,200 sq ft = $1.75/sq ft.  And if in fact the "10% waste factor" is unnecessary, the total is $3,700/2,200 sq ft = $1.68/sq ft.  That amounts to 65-75% less than "retail."  Well worth the investment of my time, and of some money in additional equipment; a Peavy (Peavy Manufacturing) and a chainsaw-powered winch and accessories (Lewis Winch), both for moving/handling the logs, and felling wedges (Timber Tuff).  These tools will provide many years of service.

International 1/4 inch Log Rule [1]
So, one might ask oneself, how do you know how much flooring you have on the ground in the form of logs, or, how much flooring is in that tree over by 'der?  Needless to say perhaps, some smart folks have already figured that out for us.  There are many so-called "log scaling" rules, fortunately "only three, Doyle, Scribner,
and International, are widely recognized and in current use."[1]  Doyle is the simplest in terms of its formula, Board Feet Doyle = (D-4)2 x (L/16), where D is the diameter in inches, and L is the length in feet.  Unfortunately, since Doyle subtracts 4 inches from the diameter for "edgings and slabs," it dramatically underestimates the amount of wood in smaller logs.  I am taking down trees in or close to the specified range of 16-26 inches in diameter, and closer to the small end of that range.  At a log diameter of 16 in., the Doyle scale underestimates board feet by 20% compared to the scale regarded as the most accurate, the International 1/4 inch Log Rule.  "The International Rule was developed by Judson F. Clark in 1900 while working for the Province of Ontario. It is probably the most accurate of the current rules but has found little use. It is based on a very carefully researched analysis of the losses occurring during the conversion of sawlogs to lumber and is one of the few rules incorporating a basis for dealing with log taper. Based on studies of northeastern tree species, Clark made a conservative taper assumption of 1/2-inch change in diameter for every 4 feet of log length."[1]  Since I am not using the rule to establish price, rather only the quantity in board feet that I will deliver to the mill for processing, I intend to use the most accurate estimate available.  I have abbreviated the table; the full table can be retrieved as referenced.

My understanding of the terms "slab," "cant," and "edging" as they apply

to the milling of logs

I have felled three trees so far, yielding a total of nine 8 foot 6 inch logs.  For my purpose, to ensure that I put enough logs on the ground, I am rounding the length down to 8 feet, and the diameter down to the nearest inch.  The log diameters and board feet (from the table above) then are: 13/55, 14/65, 14/65, 15/75, 14/65, 13/55, 14/65, 14/65 and 13/55, for a total of 565 board feet.  Since I need to deliver 2,750 board feet to the mill, I have 20% of the total on the ground.  I am not taking trees for their size, rather I am taking the trees where I need to clear space for future buildings, including but not limited to, the sugar shack, outdoor wood boiler room, firewood shed, and workshop.  In those locations I have identified for felling some larger trees, so I hope I will need to put only 6-7 of the larger trees on the ground to reach the 2,750 board feet objective.  Which brings us to the question of scaling standing trees.

Again, there are numerous methods for determining the volume in board feet of standing trees (also known as "stumpage," in the vernacular).  For the sake of consistency, I will stick with what again is considered to be the most accurate method, and that is the International 1/4 inch Log Scale volume table, as adapted for Form Class 78.  To enter the table, the Diameter at Breast Height (DBH, 4-1/2 feet), the "merchantable height" (in 16 foot logs), and the "form class" (percentage ratio of the diameter inside the bark at the top of the first merchantable 16 foot log, to the DBH (outside bark)) are are required.
Gross Volume of Trees, International 1/4 inch Log Scale,
Form Class 78 [1]

"Form class can vary for a given species, age, diameter, and height. For the most accurate estimates, a separate form class should be determined for each diameter class and species tallied."[1]  Until I establish by measurement otherwise, I will use a volume table for the International Rule, based on Form Class 78, "the most commonly used class."[1]  I have abbreviated the table; the full table can be retrieved as referenced.

Simply stated, "merchantable height includes that portion of a tree from stump height to a point on the stem at which merchantability for saw timber is limited by branches, deformity, or minimum diameter."[1]

There is a long way yet to go on this project, and a great deal to learn along the way.  We are hopeful that we will have our sugar maple flooring installed by late spring, after the maple sugaring season ends would be convenient, though it is unlikely that the dates will line up to support our convenience, knowing Murphy as we do.

There is a new feature at the bottom of the page, where you can record your "reaction" to the post.  Thank you for reading and commenting on the blog.  Your comments and criticisms, your inputs and acknowledgements, are welcomed, and will help me to improve my posts.  I am learning, too.

 Please "follow" the blog by clicking on "g+ Follow," or by e-mail at  "Follow by Email."   Also, "Like" us on Facebook at www.facebook.com/swmichiganhomestead.

-- John, 23 October 2014
www.swmichiganhomestead.blogspot.com

[1] "Log and Tree Scaling Techniques," Purdue University, Forestry and Natural Resources, Web. Retrieved 22 October 2014.

Friday, September 5, 2014

A Jackie Clay-Atkinson Homesteading Seminar, Summer 2014

Earlier this year, I had decided to give my wife for her birthday, the gift of attending a Jackie Clay-Atkinson seminar.  For those of you who might not know of Jackie, I submit the following from the Backwoods Home Magazine entry on Wikipedia, "Jackie Clay-Atkinson, an independent off-grid homesteader in northern Minnesota, writes articles on all aspects of self-sufficient living, from growing herbs to butchering elk. In addition, her "Ask Jackie" column answers questions from readers on many topics, with emphasis on home skills like safely preserving foods. She brings similar topics to her Backwoods Home blog."  To find a list of Jackie's articles at Backwoods Home Magazine, click on this link.  At first I had not planned to attend the 3-day seminar, but as time passed, and the date approached, I finally decided to see if there was room left in the seminar for me.  Fortunately there was, and in a effort to make it more than a purely educational endeavor, I decided to rent an RV and make a vacation of it.  Geri loved the idea of the RV, and on Thursday the 5th of June we headed for the far north of Minnesota, and the homestead of Jackie and her husband Will, just 90 miles from the Canadian border.

The trip was 12 hours more or less, with occasional stops for rest and to refuel.  On the drive, we listened to the audio-book Second Nature: A Gardener's Education, by Michael Pollan.  Audio-books, and podcasts, are both good ways of putting your daily commute, or a long drive, to productive or entertaining use; this book by Pollan was both entertaining and educational.  Pollan has written several other books, the most well know of which might be, The Omnivore's Dilemma: A Natural History of Four Meals; you can check out Michael's author's page on Amazon at this link.  If you are in need of a laugh, listen to A Walk in the Woods: Rediscovering America on the Appalachian Trail, by Bill Bryson, though you will be laughing so hard you may not want to be operating heavy equipment at the time!

Geri had researched nearby campgrounds ("nearby" is a relative term in the expanse that is northern Minnesota), and we decided to stay the nights in McCarthy Beach State Park.  We arrived in the area Thursday night, and set up camp, which did not require a whole lot more that parking the RV and plugging it in, and that was about all we were up for after the long drive.  The mosquito population was impressive to say the least, both at the park and on Jackie and Will's homestead, the worst they had seen in years.  We regularly slathered on Deep Woods Off, and did not have too much trouble.

On arrival at the homestead Friday morning, we were greeted warmly by Jackie, and were made to feel like long lost friends.  Aside from Geri and me, there were only five other seminar participants, Troy, Margie, Jessi, and Richard and Patty, which made for a great learning environment, and fostered friendships we hope to enjoy for years to come.  Included in the seminar agenda were:
  • Using carpentry tools and  chainsaws safely
  • Basic homestead building skills
  • Slip-form concrete work
  • Growing more challenging garden vegetables; getting more out of your garden
  • Veterinary care for homestead animals and poultry
  • Raising baby animals and poultry
  • Grafting fruit trees and fruit tree varieties for your orchard, and
  • Self-reliant living on a shoestring
Jackie showing us one of her Victoria rhubarb plants.  In the background on
the left is the structure of one of their hoop houses.  The green cone shapes
in the left of the frame are "Walls-O-Water" around tomato plants, these allow
planting up to six weeks earlier than otherwise.
The first day included a guided tour of the homestead by Will and Jackie.  This was of course more than just a tour, as we students were also asking questions throughout, and listening intently to the answers.  I took copious notes.

I definitely learned new things, and things I already knew were reinforced, chief among them that I can succumb to making things a lot more involved than they need to be.  Sometimes it is more productive to just "go," be done with the planning, "just do it," and learn by the doing.  For example, I was struck by how close Jackie and Will were to satisfying all of their electric power needs with only a small (400W as I recall) wind generator, and an even smaller (about 200W if memory serves) photovoltaic array.  This system was a prime example of "self-reliant living on a shoestring."  Is the system perfect?  No, and as has often been said, "perfect is the enemy of good enough."  Jackie and Will are learning by experimenting, while most others are still thinking about it.  They were running a generator for a couple of hours a day, though with a little more "green" energy generation and storage, they will leave behind the need for regular use of the gasoline-powered generator.
Left: Will describing the design and build of the hoop houses; dimensional treated lumber, "1 in. S40 Rigid PVC Conduit Max 90 deg C Sunlight Resistant," and greenhouse plastic, are its primary constituents.  Just at Will's right shoulder, in
the background, is one of their Boer/Nubian-cross goats for milk production.  Right:  Will demonstrates the use of a Oscar 121 wood mill, as Troy looks on.  The base for the mill makes use of a re-purposed mobile home base-frame.
The orchard was another opportunity to ask myself the question, "what on earth am I waiting for?"  No doubt we have all experienced it; we are stopped by fear of the unknown, or fear of failure, when having finally made the move, if ever, we find that it was not close to as bad as we thought it might be.  In the orchard I am specifically referring to the process of grafting.  First of all, it had never occurred to me to graft onto the 20 or 25 crab apple trees that are already established and thriving on our homestead.  Maybe I should take another step back; at first I did not know that grafting was required!
One of the trees in the orchard.  See the trunk
protector.  What appears to be hay around the
base of the tree is in fact hay mixed with
manure.  The orchard is protected from deer
by 2 in. by 4 in. mesh, 6 ft high fencing, on
8 ft. posts that were placed 15 ft. apart.
 Most apples that you buy at the store, I dare say all, will not grow "true" from seed.  That is to say, if you save the seeds from a Pink Lady apple, one of my favorites, and plant it, it will not grow to produce Pink Lady fruit.  The way to grow Pink Lady apples, is to get scion from a tree that is yielding Pink Lady apples, and graft that into the stock of another tree, which has been selected for its hardy root stock.  According to Merriam-Webster, a scion is "a detached living portion of a plant (as a bud or shoot) joined to a stock in grafting."  Grafting is "the technique most commonly used in asexual propagation of commercially grown plants for the horticultural and agricultural trades."  Grafting onto our crab apple trees is high on my list for the spring of 2015.

The group asked many questions during the tour, and we had a lot of conversation about many of the productive plants growing on the homestead, including asparagus, onions, cherries, tomatoes, apples, and so on.  Invariably the following phrase was heard when on the subject of creating fertile soil, "mo' pooh pooh."  We heard this so often that I believe it can be said to have become the class motto!

On Saturday we learned about canning, cheese-making, dehydrating, seed saving, and chicken-keeping, among other things.  At the end of the day, I wrote the following in my notebook:
          "Day 2 take-aways
Jackie in the canning process, Patty in the
background.  Note the All American 921 on
the front left burner.
          - canning is not rocket science, go do it
          - canning meat is no big deal
          - dehydration, no problem..."

Does that sound familiar?  Of course it is a big deal, to the uninitiated, as was the grafting we had learned about on Friday.   It became much less intimidating after working with Jackie in the kitchen.  I was especially interested in the process of canning meats, like chicken for example.  You can read all about canning in Jackie's books on the subject, which you can find on my references page; look under the "Gardening / Food Preservation / Cooking" heading.  And, this is also the day that Jackie bailed me out, because one of other gifts I had given Geri on her birthday was an All American 921 21-1/2-Quart Pressure Cooker/Canner.  When I gave her the canner, Gina and Peter agreed that the only thing less appropriate that I could possibly have given would have been the proverbial vacuum cleaner!  From my point of view, as an engineer, this piece of equipment is a masterpiece of engineering, a simple yet elegant solution, beautiful to look upon, and functional, not to mention bulletproof; it will literally last a lifetime, and more.  Seeing Jackie in action with her own 921 was thankfully enough to redeem Geri's respect for my gift-giving abilities.

Jackie adding milk to the pot in the making of
lemon cheese.  She's working on a propane-
fired range, check out the old wood burning
stove to the left of the frame.
Jackie separating the whey
from the lemon cheese curds
using the old t-shirt.
We also learned about
cheese-making, in perhaps one of its simplest incarnations, so-called lemon cheese.  This cheese takes no more than a large pot, a spoon, a thermometer, milk (in this case raw milk provided by Troy), lemon juice, and a cheese cloth, or, when living on a shoe string, an old t-shirt.  The result is a ricotta-like cheese of very mild flavor.  There are also all sorts of uses for the whey, so that by-product of the process can be saved.

Throughout the weekend, our food needs were well met by two of Jackie's close friends, Jeri, not to be confused with my Geri, and Linda.  As Jackie had assured me in an email leading up to the workshop, "We provide a huge country-style meal around noon each day...nobody ever leaves the table hungry!!"  Jeri and Linda delivered on that promise.  These two were just a hoot, and being homesteaders themselves, brought a lot to the seminar aside from the delicious meals.  We were all impressed when Linda pulled out her homemade electric spinning wheel and began to spin wool yarn from washed fleece.  It is truly humbling to see how things were done by so many just a few short decades ago, and are still being done by a few today.  I think we all had fun watching, and listening to Linda describe the process.

Linda spinning wool and teaching, while Geri
listens and learns.
On Sunday we got some training in administering meds to animals or humans by injection, and to suturing.  Jackie has years of experience in caring for animals, and it was great be able to pick up even a little of what she has learned.

We split up later on Sunday, I and a few others went with Will to learn about slip form concrete work.  Will is building a barn, and is including a concrete and stone knee-wall on the perimeter.  One or more slip-forms is built, and then used as a form into which the concrete is poured.  When a section has been poured and set, the form is then removed and re-positioned to create the next section of the wall.  It is customary to coat the form with some sort of releasing agent, such as used motor oil, to make it easier to remove the form from the wall after it has set.  Several of us worked with Will to pour two sections of the wall.  Will had already poured the footing and put the slip forms in place, so we selected stones and positioned them in the form, and then mixed and poured the concrete.

Looking down into a slip form, the footing
is visible; reinforcing bar (re-bar) strength-
ens the structure.  Also, note the twisted wire,
which prevents the sides of the form from
bowing out when the form is filled with 
concrete.

Stones positioned in the form
Will showed us how to mix the concrete, using cement, sand and gravel from their property, and water.  The mixer was powered by a portable generator.  This was our last "class" of the weekend, and gave us a chance to get our hands dirty and actually help, if only a little.

During the seminar I had collected the email addresses of the participants, and promised to share those after we returned home.  It is hard to describe how good we felt then, so I will simply quote from my email to Jackie and Will, and our fellow seminar-goers:  "There were some wet eyes as we departed Jackie and Will's homestead.  We learned so much, and it was so comfortable to be among kindred spirits.  We felt like we were leaving old friends.  I have not even begun to review and take action on all the notes I made during the seminar.  So, to Jackie and Will, our heartfelt thanks, for both a great education, and a great time, on your homestead.  I miss the conversations the most.  And please extend our thanks to Jeri and Linda; the food was simply amazing, and they also introduced us to a number of other skills."
Will and Troy preparing the concrete

Perhaps we will have a chance to repeat the experience in the future, or maybe even to host our own seminar.  It would be almost impossible to match either the homesteading experiences, or the hospitality, that we enjoyed at the hands of our hosts, Jackie and Will.

Thank you for reading and commenting on the blog.  Your comments and criticisms, your inputs and acknowledgements, are welcomed, and will help me to improve my posts.

 Please "follow" the blog by clicking on "g+ Follow," or by e-mail at  "Follow by Email."   Also, "Like" us on Facebook at www.facebook.com/swmichiganhomestead.

-- John, 11 August 2014
www.swmichiganhomestead.blogspot.com

Jackie Clay-Atkinson and Will Atkinson's Homesteading Class of June 2014
L-R: Jessi, John, Geri, Jackie, Troy, Will, Margie
Not Pictured: Richard, Patty