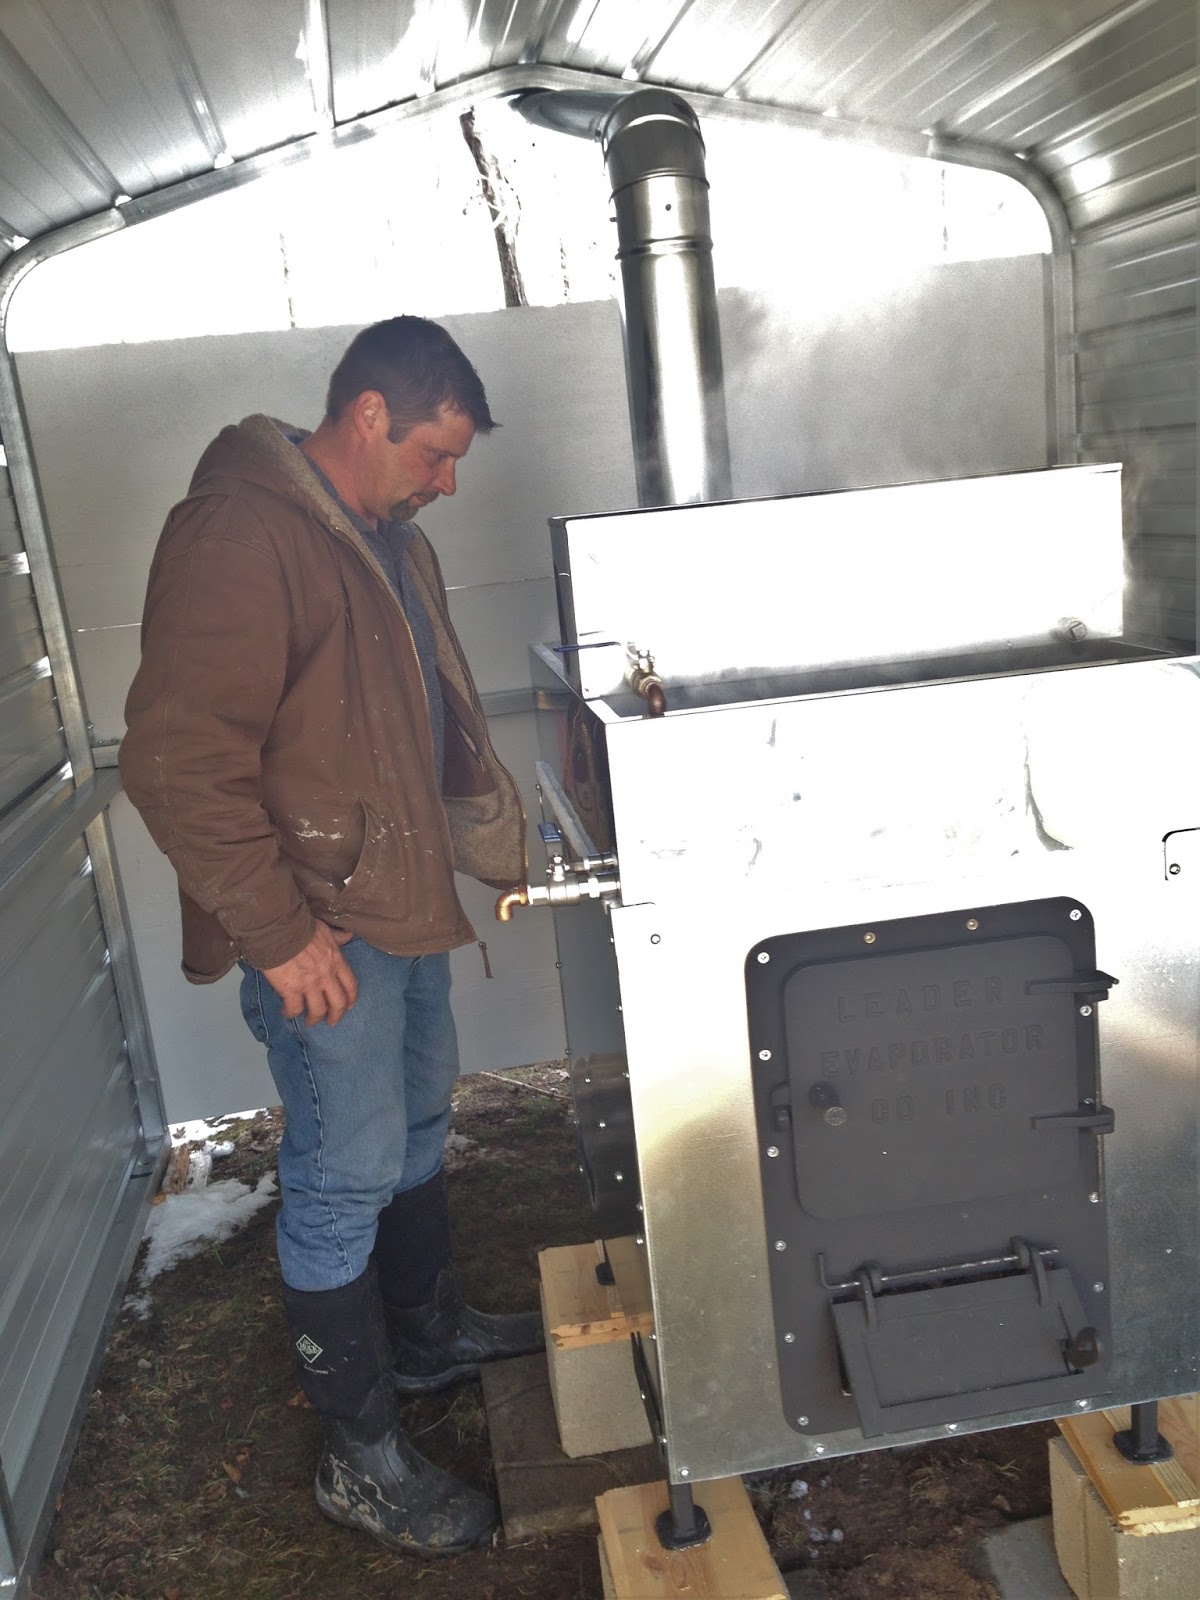
Showing posts with label provider. Show all posts

Monday, May 9, 2016

2016 Maple Syrup Season Lessons Learned


This season was disappointing in some ways, and a grand success in others.  On the disappointing end of the spectrum, is the low yield this year.  This low yield was due to a confluence of factors, some within our control, and some not.

  1. We got into the woods late, we tapped late, as our process was not yet ready for sap.  We started tapping, and collected the first sap, on the 28th of February, all 100 taps were not in until March 3rd.
  2. The weather did not cooperate very well.  We had a couple of decent snows, but it warmed up so quickly that the snow melted in a couple of days.  In prior years we had used snow to keep our sap cool until we could get it processed; no such luck this year.  The result of insufficient cold storage was that some sap never made it to the evaporator.
  3. By March 13th I was evaporating the last of the sap, and there was no sap flow favorable weather in the 10-day forecast.
So for us it was a two week season, as opposed to the usual four to six weeks, and in that two weeks, we had five days of no sap flow, between March 1st and the 5th.  The short story is, we ended up with about a quarter of the syrup that I had been planning for.

On the grand success end of the spectrum, is everything we learned, and the enjoyment of doing the work and sharing it with our community in Michigan, on Facebook, and with all of you here on the blog.  Based on what we learned, I anticipate that we will do much better in the spring of 2017.

To ensure that we actually do better in 2017, we will be making a number of improvements to the process this year, based on the lessons learned in the table below.  I have highlighted in yellow some of the key things that did not go well, and in green some of those that did go well.  Solutions have not yet been identified for all of the problems, but Geri and I met and have already decided that while some things will stay the same, there will be some changes for next year.  We decided to:

  • not tap more trees, we will stay at 100 taps
  • expand the capacity of the Half Pint; specifically an arch extension kit and pan will be added, which can increase evaporation rates by up to 65%
  • add a combustion air blower to the Half Pint

    (together these two modifications to the Half-Pint should take it to 100 tap capacity)
  • improve water management in front of garage/sugar house
  • put a wood chip/pea gravel "floor" in sugar house
  • and we will not finish the syrup in the Half Pint; we will draw it off when it is "near syrup," and finish it in pans over propane burners
These decisions have mostly to do with what it would take to go bigger than 100 taps.  It would take a larger evaporator than the Half Pint, and the evaporator I have in mind would require a larger sugar house; there would probably be a need for some labor help, more buckets and taps, more sap handling and syrup finishing equipment, etc.  That is simply more than we want to take on, while at the same time ramping up the Sawyer and Soaper businesses.

The decision regarding how to finish the syrup has to do with the fact that temperatures at the Half Pint draw-off are relatively unstable, especially when drawing off, which is to say the temperature can climb to well above 219°F.  If the temperature climbs above 219°F the syrup is too dense, and if the syrup is dense enough, 68 Brix or above, the sugar can precipitate out after it is bottled.  Not good.  In my view, a cause of the temperature instability is the small capacity of the evaporator, and another is that the heat under the Boiling Pan cannot be quickly modulated.  In any event, there is too much risk in burning the syrup, so we are changing the process to ensure we produce great syrup, first pass.

I will leave it at that for now.  If you have any questions, please leave them in the comments; I respond quickly.

Please "follow" the blog, and Like and Follow us on Facebook.

-- John, 09 May 2016

(See the Process Flow Diagram at http://swmichiganhomestead.blogspot.com/2016/03/maple-syrup-process-flow-diagram.html)

2016 Maple Syrup Season Lessons Learned
Process Step Lesson Learned Comments

What did not go well?
0 Process Management Need to develop an evaporator log sheet based on checks per 8 minutes White board worked well, but not a permanent record. Fix it for 2017.
0 Process Management Pallet flooring was better than nothing, but unsafe Melting snow and rain, plus condensation from evaporation. Fix it for 2017.
0 Process Management Equipment cleaning is an issue Investigate for 2017.
0 Process Management It was very wet and muddy at the front of the sugar house Fix it for 2017.
0 Process Management Personal hygiene facilities needed Using the house is okay for now; when more help is required we will need facilities.
0 Process Management We were not ready, enough Develop timeline for 2017 set-up.
0 Process Management Being tapped in Feb would have resulted in much more sap/syrup Develop timeline for 2017 set-up.
0 Process Management Too many trees, not enough evaporator Expand evaporator capacity in 2017; Consider Half-Pint extension, combustion air blower, propane-fired finishing evaporator.
0 Process Management Freshness of sap is KEY It should be like looking through water; milky sap has gone off.
0 Process Management We were not ready with pricing, labeling, marketing
1 Obtain Necessary Equipment & Supplies Needed to get the evaporator earlier for construction and installation Adjust plan for 2017 accordingly.
3 Tap Trees Need to mount the inverter, stable and dry, in/on the Ranger Fix it for 2017.
5 Sap Handling A barrel lifter for the 30 gal barrels to/from the back of the Polaris would have been handy This may not have been required had we had enough evaporating capacity, or enough storage (275 gallon tote) capacity.
5 Sap Handling More 30 gallon barrels These may not have been required had we had enough evaporating capacity, or enough storage (275 gallon tote) capacity.
5 Sap Handling Electric sap pumps would have saved time (look at solar powered (12VDC) well pumps) Investigate for 2017.
5 Sap Handling The 30 gallon barrels move around too much in the back of the Ranger Fix it for 2017.
5 Sap Handling The funnel/filter was not well secured to the top of the 30 gallon barrels; it would move around and even come off altogether Fix it for 2017.
5 Sap Handling Definitely need labor for collecting if we go bigger Not going bigger in terms of taps for 2017.
6 Remove Water from Sap Need to manage condensation; it was getting wood and equipment wet inside the sugar house Investigate for 2017.
6 Remove Water from Sap We do not seem to be getting as much syrup as I expect from a given amount of sap. Is it true? If so, why? Investigate for 2017.
6 Remove Water from Sap The process of removing foam is messy; what can be done? Investigate for 2017.
6 Remove Water from Sap The measuring wire for pan depths could have been longer; Geri's hands got hot using it Fix it for 2017.
6 Remove Water from Sap Wood needs to be in sufficient quantity, local to the sugar house, and of correct size  Fix it for 2017.
6 Remove Water from Sap Size of evaporator; plan for 3 gallons per day per tap "worst case," and plan to evaporate it in 20 hours of operation See expansion plans for 2017. Use this rule of thumb for later years.
6 Remove Water from Sap More, and DRY wood (see YouTube "Maple Syrup with Skip Drake 42 min 1920x1080" for 3-step firewood process)
6 Remove Water from Sap Evaporation on this scale (Half Pint, 5 – 7 gallons per hour) is not truly continuous flow; the syrup/”near syrup” comes off in batches.  It is also typical to go past the “syrup state” of 66 Brix at the boiling point of water plus 7 degrees; density reduction is then required. Plan for drawing off as “near syrup,” finish under tighter control over propane burners.
7 Syrup Finishing Need syrup/"near syrup" storage for before finishing/filtration and bottling Investigate for 2017.

What went well?
0 Process Management The regular 6-8 minute process checks
3 Tap Trees The 1000W inverter worked pretty well, maybe a little under-powered for the 3/8" drill for tapping This solution to insufficient drill power from battery powered portables, will not scale to 1,000 taps, but it's good for 2017.
5 Sap Handling The Polaris Ranger was indispensable Also used in process step 3 Tapping Trees.
6 Remove Water from Sap The pan depth measuring wire worked extremely well and was convenient
6 Remove Water from Sap White board for recording evaporation process management
6 Remove Water from Sap Good lighting is a must The string of 5 LED lamps worked very well in the sugar house.
7 Syrup Finishing The filtration and canning unit worked well
7 Syrup Finishing Reducing density process worked


Monday, April 25, 2016

Assembling the Leader Evaporator Half Pint - Parts 3 and 4 of 4

In this installment will be documented the moving of the bricked arch to the sugar house, leveling the arch/evaporator, installing the stack, and the first (test) boil using water and baking soda.

To see how we got to this point, see:

Part 1, "Assembling the Leader Evaporator Half Pint - Part 1 of 4," can be found at http://swmichiganhomestead.blogspot.com/2016/02/assembling-leader-evaporator-half-pint.html, and Part 2, "Assembling the Leader Evaporator Half Pint - Part 2 of 4," can be found at http://swmichiganhomestead.blogspot.de/2016/03/assembling-leader-evaporator-half-pint.html.

We knew that moving the arch from the house to the sugar house would be "challenging."  Unfortunately the controlled environment of the house was necessary to facilitate the curing of the refractory cement used in the process of installing the firebrick.  Getting the sheet metal and cast iron shell of the arch into the house was no real problem, Geri and I accomplished that in less than 30 minutes, using only the garden cart as a simple machine.

Moving the shell of the arch onto the garden
cart for transport to the house
Moving the firebricked arch out to the sugar house, and getting it up onto its foundation, was another matter altogether.  The firebrick alone weighs ~200 lbs, plus at least 3 gallons of refractory cement (MEECO'S RED DEVIL 610 Refractory Cement ), that is ~60 lbs, plus the weight of the arch shell, I put that at 50-75 lbs, and we are somewhere between 310 and 325 lbs of dead weight.  We used a few 2x4's that were lying around, and fashioned a sort of litter, although carrying the arch in that way simply did not work for more than a couple of steps.  We ended up sliding the 2x4's under the arch, picking up one end, sliding the arch down to the other end, and repeating that process, a couple steps at a time.  It literally took four men to lift and carry the arch out of the house, with an additional man to supervise the operation.  Things got a bit easier after the arch was clear of the house.

Once outside the house, we manhandled the arch onto the utility trailer, and towed that behind the UTV over to the sugar house.  Then, more brute force getting the arch off of the trailer, into the sugar house, and onto the pads I had prepared for it.  Moving the arch from the house to its pads in the sugar house, was definitely to toughest part of the commissioning job.

Many thanks to (l-r) Nathan Douglas Smith, Gene Feid, Tommy Smith, and Dennis Goss, these guys put the man in manpower.


Concrete and cedar "pad,"
plus shims for 
leveling
After the arch was on the pads, we leveled it front to back, and side to side, using a 4 foot level and softwood shims of the type that are normally used to level and plumb a door or window frame.

The final step of the arch installation, was to install the stack.  Dennis and Nathan had helped me to select the various straight sections, elbows, and the cap we would need, all in 6 inch diameter stove pipe from the local hardware store.  At first I had thought that we would go straight up through the roof, but as usual, two or more heads are better than one, and we decided to go up and out the back of the sugar house, between the top of the rear wall and the peak of the roof.  The amount of vertical stack recommended by Leader Evaporator is a minimum of 9 feet; when assembled our stack stood with a height from arch outlet to stack cap at 7 feet.


Dennis supervising the First
Boil
The assembly and installation of the arch having been completed, the next step was to put the Boiling and Reservoir Pans on the arch, and then to conduct the test boil.

As it turns out, we actually performed two test boils.  During the first, we just could not seem to get the entire boiling pan to a rolling boil.  The solution to this problem brought to light that it is not enough to simply Read The !@#$%^& Manual, one must also adhere to the manual, or understand completely why it is unnecessary in a particular case.  The fact that enough vertical stack height had not been installed, proved to be the problem.

Perhaps counter-intuitively, the draft (flow of combustion air) into the fire box and up the stack, is directly proportional to the height of the stack.  Another whodathunkit moment!  I do not know how often I have proven my high school math teacher, Mr. Lauer, correct; all of those equations, and more importantly the science behind them, do come in handy.  Teenagers can be such asses, and I was no exception!  I suppose I am still no exception from time to time.

Per that go-to source, Wikipedia, Flue Gas Stack (https://en.wikipedia.org/wiki/Flue-gas_stack):

Flue-gas flow-rate induced by the draft[edit]

As a "first guess" approximation, the following equation can be used to estimate the flue-gas flow-rate induced by the draft of a flue-gas stack. The equation assumes that the molar mass of the flue gas and the outside air are equal and that the frictional resistance and heat losses are negligible:.[5]
Q = C\; A\; \sqrt {2\;g\;H\;\frac{T_i - T_o}{T_i}}
where:
Q= flue-gas flow-rate, m³/s
A= cross-sectional area of chimney, m² (assuming it has a constant cross-section)
C= discharge coefficient (usually taken to be 0.65–0.70)
ggravitational acceleration at sea level, 9.807 m/s²
H= height of chimney, m
Ti= absolute average temperature of the flue gas in the stack, K
To= absolute outside air temperature, K
____________________________________

What does all that mean?  Well to me it means that the flow rate of combustion air through the arch and up the stack is proportional to the square root of the the height (H) of the stack.  So, if we assume nothing else changes, and we increase the height of the stack from "1" to "1.3," or a 30% increase, the change in the flow rate would be increased by √1.3 - √1 = 1.14 - 1 = 0.14 or 14%.  In other words, if the stack is 10 feet, and I increase its height to 13 feet, the flow rate through the arch will be increased by 14%, which means hotter fire and more sap evaporation.

I trust someone will check my my math and comment if it is incorrect.

Based on that analysis, we added 3 feet to the 7 foot stack, and voilá, blast furnace-like performance of the arch and evaporation rates within Leader's specified range.  Heck, I may try adding another 3 feet for 2017.

According to Leader Evaporator:

The first boil is done to remove any residual materials from the pans and to “season” the bricking and insulation.
1. Prepare 15 gallons of a baking soda and water mix in proportion as follows:
  a. 1-1/4 ounce of baking soda
  b. 15 gallons of water
2. Fill the boiling pan with the baking soda : water mix to a level of approximately 3 inches.
3. To season the bricking, start by building a small fire in the fire box and very gradually build to a normal fire.
4. Boil the solution for approximately 30 minutes. Watch the boil carefully and replenish the solution as needed to ensure the solution in the pan remains at approximately the 3 inch level.
5. Check all equipment:
  a. No leaks at fittings
  b. Pan is boiling evenly
  c. Valves work properly
  d. Draft is correct (pan boils evenly)
6. Drain the baking soda solution from the pan. Rinse the boiling and reservoir pans thoroughly with clean unsoftened, non chlorinated well or spring water. Drain the water and dry the pans.

Having finally satisfied element 5 d., we were able to drain, rinse, drain again, and dry the Boiling and Reservoir Pans, making us ready for evaporation of the first sap of the season.

Please "follow" the blog, or Like and Follow us on Facebook.

-- John, 25 Apr 2016

Wednesday, March 2, 2016

Assembling the Leader Evaporator Half Pint - Part 2 of 4

Part 2 involves assembly of the Reservoir Pan and the Boiling Pan, which are relatively simple and easy tasks, as well as installing firebrick in the sheet metal structure of the arch, a seemingly simple but very tedious task.

Draw-Off valve and thermometer at right front
corner of Boiling pan
I assembled the pans first, which only involved the addition of draw-off valves and thermometers ( 2 each) to the Boiling Pan, and the addition of what I am calling a "make-up feed valve" to the Reservoir Pan.  The only tool required is an adjustable wrench, and aside from the parts supplied with the evaporator, the only item required is a roll of teflon tape to seal the pipe-threaded joints.  Pictured is the draw-off valve and thermometer installed at the right front of the boiling pan, there is an identical set of valve and thermometer at the left rear of the boiling pan.  Having draw-off capability at opposite corners allows the flow through the Boiling Pan to be reversed, which minimizes the build-up of "sugar sand" in the Boiling Pan.  A "solid, sand-like material in the bottom of the syrup pan ... is sugar sand (commonly calcium malate crystals containing varying amounts of sugar).  Excessive amounts of sugar sand on the bottom of the pan can burn, giving the syrup an unpleasant strong caramel or bitter taste, and possibly damage the pan."¹  In our first two years as hobbyists we did not experience trouble with sugar sand build-up in our boiling pan, probably because we did not take the sap all the way to syrup in the boiling pan; we drew off the final 3-4 gallons from the boiling pan and reduced it to 12-16 cups of syrup on the range in the house.  I will have more to say on sugar sand and the operation of the evaporator in a later post.

If you look closely at the picture you might also find it interesting that the thermometer has an indicated range of only 0 to 50 degrees, and that the "7" is made to rest at the bottom of the dial as installed.  Syrup boils at approximately 7° F above the boiling point of water, regardless of altitude or barometric pressure.  Taking advantage of this fact, it is possible to adjust these thermometers to "0" when pure water is boiling in the pan, so that when "7" is indicated with the evaporator in syrup-making operation we know that its sugar content is approximately 66%.  With the "7" placed at the bottom of the dial, only a quick glance at the thermometer is required to know that the sugar concentration is at or near 66%; the final determination of sugar content is made by hydrometer (measure of specific gravity) or refractometer (measure of index of refraction).

Now on to the fun stuff, installation of the firebrick.  Let me just say up front that I am no mason!  And, eventually the job of "firebricking" the arch was done in spite of the inexperienced hand on the trowel.  This more difficult than it needed to be, for at least three reasons:

1) The instructions call for putting "about 1/8” on each edge of the brick to be installed and a skim coat on the side facing the metal," but the "fit" having done so is not as depicted in the instructions, and
2) I decided to fit the bricks to/around the nuts and bolt ends that protrude into the arch, versus simply pushing the bricks up against the fasteners, and finally,
3) the cement needs to dry at "room temperature (approximately 65°F)," and the only place I could maintain that temperature for extended periods of time was in the house.  This third difficulty was not a problem until it came time to move the arch to the sugar house!  The process of moving the arch to the sugar house will be included in Part 3 of 4.

Sample of brick instructions for floor of the arch
First came a leveling of the arch using a 4 ft. level and quarters for shims.  This is an absolutely necessary step, as was found out when the team and I were leveling the fully bricked arch in the sugar house; with the brick fully cemented into the arch, the arch becomes very stiff.  What I mean by "stiff" is that the arch will hold whatever shape it was in when the brick was installed.  In still other words, if it is not square and the top surface is not level before bricking, it will be extremely difficult to make it so after bricking.  The top surface is key, because when the Boiling Pan is mounted the sap needs to flow front to back, left to right, right to left and back to front, with equivalent ease, for the evaporator to work as designed.

Bricks laid out for floor of arch, with
refractory cement and instructions
The instructions (Leader Half Pint Assembly and Operation Instructions) depict a dry fit of the bricks, which is to say they do not allow for the 1/8 in. of refractory cement on the edges of the bricks.  If you count the joints between bricks front-to-back in this picture there are 6 (at 1/8 in. per joint that is 3/4 in.), and side-to-side there are 2 (1/4 in. at 1/8 in. per joint), which resulted in the need to do more trimming of brick to fit than was accounted for in the instructions.  Surely my joints were a bit wider than 1/8 in. which contributed to the need for additional cutting. Fortunately I did not need any additional bricks, in fact there was one Half Brick (HB) left over.

I worked in the order provided, which was Floor, Back, Side (1), Side (2), Front, and Firewall.  Things went more smoothly as I learned, but I definitely spent more time in this endeavor than anticipated.  As work was started, the included image shows the sheet metal and iron structure of the arch, the refractory cement (which was not nearly enough to complete the job), the instructions, and a "dry fit" of the bricks needed to complete the Floor.  With the use of 1/8 in. tile spacers during the dry fit stage I might have realized what was going on earlier, or perhaps if closer attention had been paid to the caveat in the instructions, which is, "Measurements in these drawings will vary depending on the technique used in bricking."  Well of course measurements will vary, why didn't I think of that!

Left side; (L) bricks dry fit, (C) brick 8 relieved for protruding nut/bolt, (R) brick 8 installed and cemented in place
Those pesky nuts and bolts; I was simply not content to only push the firebrick up against them, for among other reasons there would be a 1/2 in. gap between the brick and the sheet metal shell of the arch.  So, like is done when installing drywall around an electrical outlet, I measured and made cuts, in this case drilled 3/4 in. holes, in the brick to allow it to fit around the nuts/bolts.  The picture above shows the process using "Block 8" as an example; I numbered the blocks 2, 4, 6, 8, 10 and 12 from front to back on the left side, and 1, 3, 5, 7, 9 and 11 from front to back on the right side, to keep things in order when going to and from the garage.

The left and right sides were the most difficult parts of the firebrick installation, this was due predominantly to the number of projections into the firebox, including the grate rail (where the fire grate sits) and the nuts/bolts securing the grate rail and the nuts/bolts in the corners securing the front and back panels to the side panels.  Still, things went as well as could have reasonably been expected.  I am very happy with the outcome, and I expect the attention to detail to pay off in the life of the arch.Please "follow" the blog, or follow us on Facebook.

-- John, 02 Mar 2016

Easier said than done, the evaporator positioned on leveled blocks in the sugar house


1. Randall B. Heilegmann Ph D, “Chapter 7. Maple Syrup Production,” in North American Maple Syrup Producers Manual, ed. Melvin R. Koelling Ph D, et al. (Ohio State University Extension, 1996), 79-80.

Tuesday, February 9, 2016

Assembling the Leader Evaporator Half Pint - Part 1 of 4

This year our plan is to put 100 taps in 100 trees.  By Leader Evaporator's account, in their on-line catalog, processing the sap that is produced by those 100 taps may be a bit of a stretch with the Half Pint.  My supplier assures me that they have at least one customer managing 100 taps with the Half Pint, and with the Flat Pan at that, while we chose the newly introduced Supreme Pan for increased capacity and efficiency.  We shall see.

Leader's Hobby Evaporator Buying Guide (accessed on-line 08 Feb 2016)

On a good day, of which we have had several in each of the past two seasons, we will collect two gallons from at least some of our taps.  If we assume half of the 100 taps flow 2 gallons on that hypothetical high-flow day, and the other half flow 1 gallon, we would need to process 150 gallons of sap, preferably on that same day.  The Leader sales rep told me that they assume a 9 hour day for evaporation, so worst case we might have to work a very long day to make syrup of the entire 150 gallons, or perhaps we would extend evaporation into the next day.

Half Pint unloaded on to 2 pallets in the garage
I picked up the Half Pint on 14 January; it fit nicely, if with very little room to spare, on a pallet in the back of a Honda Pilot.  Sugar Bush Supplies Co. had it palletized and ready to go, and after measuring twice, they loaded it into the Pilot using a fork truck.  

The story of its assembly and the "first boil" will be split into four parts, Part 1 being assembly of the structure of the evaporator; the bottom, sides, back, front, legs, corner brackets, grate rails, and grate.  

Part 2 will include assembly of the boiling and reservoir pans, and installation of the fire brick.  

Part 3 will be the installation and leveling of the evaporator in the "sugar house."

And finally, Part 4 will document the first boil.  I anticipate that the installation of the fire brick will be the most challenging for me; bolting stuff together I can do, masonry of any sort is not something I have done a lot of.  Also, the refractory cement is supposed to dry at "room temperature" (65 F), which may prove challenging in our unheated garage.  Of course that is part of the allure of this adventure, a life of learning something new every day.

Starting with what was on that pallet that I picked up, the first things you might notice in the picture are the fire brick, and just behind the brick are three 3 foot sections of 6 inch diameter stove pipe, and a 90 degree elbow.  The roll of white material resting on the stove pipe is actually a part of the sugar house, not the evaporator.  Beyond the stove pipe you see some cardboard boxes (Half Pint Arch Parts List):

Cardboard Box A contained the heavy iron and hardware, including the legs for the evaporator, the grate rails, the grate, and the nuts and bolts. The nuts and bolts are all 1/4"(diameter)  x 20 (threads per inch), which is nice, however three-quarter inch and half inch length screws are all packaged in the same Ziploc bag. This has the potential of leading to a mix-up during assembly.  Been there done that of course, and it invariably leads to the need for significant disassembly and reassembly!  I sorted the 1/2" from the 3/4" before starting work.  Box A also contained the corner brackets and the Instruction Manual (link), which is commendably comprehensive and well-illustrated.

Cardboard Box B contained the sheet metal; front, back, bottom and sides, the so-called "draft latch," and the draft latch nut and bolt.

Two other boxes contained the "boiling pan" and the "reservoir pan," and the box that has "Standstrait" printed on it contained the draw-off valves and thermometers for the boiling pan, plus the "rail gasket," which goes between the arch and the boiling pan.  The white plastic pail contains the refractory cement, for attaching the fire bricks to the inside of the arch and to each other.  All parts arrived in good condition.


Steps 1-4 complete
Step 1 of assembly loosely attached the left and right sides of the arch (think of the arch as the fire box) to the bottom.

Step 2 of assembly called for raising the arch up approximately 8 inches from the working surface; I used four stacks of three full firebricks to serve this purpose.  Four 8 inch tall concrete blocks would also suffice.  The fire brick was at hand, because it is required for evaporator assembly. 

Steps 3-4 mount the legs.


Step 5-6 complete, step 8-9
in progress
Steps 5 and 6 mount the front and back panels.

Step 8 squares up the assembly and tightens bolts in the corners (the instructions called for a carpenter's square, a speed square worked just as well)

Step 9 ensures all remaining bolts are tightened


(L) Grate rails installed, (R) grate installed on rails

Step 10 is installation of the grate rail

Step 13 installs the grate assembly.


Draft door latch installed
Step 12 was to install the draft door latch, which will be used to control air flow to the fire box

I allowed 4 hours for the assembly; that included some garage clean-up before starting work, and it included the time necessary to make the photographs and document any process issues that arose.  And, in there somewhere was a break for some homemade pumpkin soup courtesy of Geri.  I estimate the process of assembly took 2 of the 4 hours.

A safety note:  Cut edges of sheet metal can be sharp; I just urge caution, avoid cutting yourself.  There are also some knuckle-banging opportunities when tightening the nuts.

To this point the work has been straightforward.  The holes in the sheet metal panels were well positioned to pull the panels into good alignment; I did not have to do any work to get the fasteners to fit through the holes.  Tools required included a 7/16 inch socket / wrench, a Phillips-head screwdriver, three C-clamps, and a speed square or carpenter's square.  Safety equipment included a pair of leather gloves to prevent the cuts and knuckle-banging previously mentioned.

The assembled arch structure, less the grate rails and grate


Please "follow" the blog, or follow us on Facebook.

-- John, 09 February 2016

Sunday, September 20, 2015

Lessons from A Beginner in the Field

Or the woods, as the case may be.  It was an interesting sit between two big beech trees yesterday.  First, well before light still, I heard a branch come crashing down, I think it landed less than 10 feet behind me and a bit to my left. (Later investigation showed it to be less than 6 feet, the branch 4 inches in diameter.)  I instinctively moved, quickly, to the right around the trunk of the tree my back was against.  Scary.  Widow-maker.  Lesson Learned:  In your scouting for a location from which to hunt, check for widow-makers, be that a ground or tree stand location.  The chances of being hit are small, the consequences large.

I was sitting with my back against the tree to the left

Then, after first light, I heard what sounded like baseballs dropping through the canopy, dropping through the leaves and branches, and hitting the ground with heavy, distinctive thuds.  "That would hurt," I said to myself!  I actually thought seriously about getting one of those hard hat shells that goes under a baseball cap, and Geri mentioned the same when I told her the story later.  I thought this was interesting because I did not hear any of it before sunrise, then, I heard maybe 10 or 20 fall over the course of 30 minutes or so, then nothing.  It had rained an inch the day before and into early hours, and an inch and a half the day before that.  There was a lot of water in the canopy, and under the trees it seemed like it was still raining as I sat.  At the time I believed that they might be black walnuts, that was all I could think of that made any sense, and I saw a relatively dark trunk (compared to the dominant sugar maples and beeches) maybe 20-25 yards in front of me; they are called black walnut trees for a reason.  I also looked this over during my "later investigation," and sho' nuf, there was a big black walnut tree and walnuts littering the forest floor.  Lesson Learned: Do not set your dumb ass under mature black walnut trees in the fall!

A black walnut falls from 80 feet onto your noggin and it is going to hurt,
and raise a lump; 
hopefully nothing worse
Fall  turkey season opened on the 15th of September; in Michigan in fall you can take either male or female, one per license, whereas in the spring you can only take the male of the species, I presume because it is mating season.  Note:  "After mating, the female turkey prepares a nest under a bush in the woods and lays her eggs. She will lay one egg each day until she has a complete clutch of about 8 to 16 eggs. The eggs are tan and speckled brown eggs. It takes about 28 days for the chicks to hatch. After hatching, the babies will flock with their mother all year."  That from no more an authoritative source than Vegan Peace, at http://www.veganpeace.com/animal_facts/Turkeys.htm  And no, I am not a vegan!  A male turkey is called a tom or a gobbler, a female turkey a hen, and a baby turkey a poult or chick. A young male turkey is called a jake and a young female is called a jenny.

I have seen turkeys as I sat this weekend, this time of year the hens tend to stick with other hens, and the toms with toms.  I am still waiting for that long-beard to come or be coaxed within range.

The first day of fall is the 23rd of September, and deer season opens 1 October.  Hopes are high.

All for now, and thanks in advance for your commentary.

-- John 20 September 2015

Friday, May 29, 2015

Of Birds, Bees and Apple Trees

It has been an active spring season on the homestead, and this post is the resulting "grab bag" of topics.  Last year I had made a commitment to myself to put up a couple of nest boxes, in hopes of convincing a pair of tree nesting ducks to stay, as opposed to passing through on migration as they did last year.  Perhaps it was a bit too late, but I did in fact build and install two nest boxes.

Everything I purchased for the project is pictured (L); 12 feet of 1 in. x 10 in.
cedar board, cut in half at the lumber yard, a roll 25 foot roll of 2 foot wide
aluminum flashing, and a box of 50 stainless steel deck screws; the
instructions are from Ducks Unlimited.  In the second picture (R) the boards
have been cut to length using the Skillsaw.  Not pictured are a few roofing
nails for attaching the flashing to the tree, two big nails for mounting the box,
and some 1/2 in. hardware cloth, all of which I had on hand.
As projects go, this one is simple and easy.  Simple in that the design of the box is simple, and in that little material and few tools are required.  Once I had the materials and tools assembled, it probably took me less than three hours to build and install both boxes; most of that time was spent building the first box.

Of course much tree duck habitat has been removed to make way for development or agriculture, but the biggest reason for providing nest boxes is to protect the ducklings from predators.  One study I read [1] put duckling survival rates at about 35%.  "Of the total number of ducklings produced, about 65% (11 l/171) were lost and over 68% (76/l 11) of all duckling mortality resulted from the loss of entire broods."  The loss of entire broods was attributed solely to predation, specifically to mink predation.  Yes, this study looked at Mallard ducklings, which nest on the ground, not tree ducks.
Left (L) image shows hardware cloth that allows ducklings to climb to the
entrance, and the 4-1/2 in. wide by 3-1/2 inch tall entrance hole. The image on
the right (R) shows the box mounted on a maple tree, with the predator guard
in place below the box.
A second study [2], this one of Wood Ducks, indicated that the "overall survival of ducklings only ranged from 15-28%," though this study was made in Mississippi, so it too is perhaps a bit "weak" as an indicator of duckling survival rates in Michigan.  Later in the paper: "By now, you are probably wondering what was responsible for the relatively low survival of ducklings? The answer was PREDATION!"  From my point of view it seems safe to say that duckling mortality is high, something close to 65% - 70%, and that protection from predators can improve the survival rate.

Another first this spring was grafting.  The cleared area around the house has on its perimeter approximately 25 crab apple trees, which are well established and date, I am guessing, to the early 70's when the house was built.
Left to Right, cutting through the outer and inner bark to the cambium
layer (L); the bark has been "slipped" at the cambium layer and the prepared
scion inserted (C); and finally the wound has been protected with grafting
compound and the branch wrapped with grafting tape (R)
The deer love the crab apples, though the same cannot be said by any humans I know.  Fruit trees have been a part of the plan since the earliest days, and grafting apple scion onto established root stock is one of the quickest ways to a harvest of eating-apples; 2-3 years or so.  I used Tanglefoot 300000529 1-Pint Tree Wound Pruning Sealer and Grafting Compound and Parafilm® Grafting Tape (Genuine by Parafilm®) 90' Roll Clear (1" - One Inch).  I chose Honeycrisp and Winesap apple varieties for this experiment, and am now putting a frequent eye on the scion for growth; it felt right, but we shall see. <Leafing out of some scion was seen on 16 May and growth continues.>

And finally, on the "sad news" front, there is the condition of our sole remaining colony of bees.  When the temperatures were peaking at over 50 degrees F in mid-April, and no bees were flying, I decided to go into the hive.  What I found was certainly not what I had been hoping for all winter.
A mouse or a vole had taken up residence in the hive.

Dead bees preserved in time at the top of the hive.  There was
no honey in the hive; they either starved or were chilled,
or more likely some combination of the two.
It was a complete mess, as the picture at left attests.  Some sort of small rodent had taken up residence, and of course destroyed most of the comb in the process.  Even in the comb that was still intact, there was no honey.  I am not a specialist in failed hive forensics, but I believe the colony had failed and all of the bees had died before the squatter showed up to stay.  In the first part of June last year, with only two boxes on the hive since installation of the colony in mid-April, I checked to see how much comb the colony had built out.  Sure enough, they had built comb all the way to the bottom of the lower box; I felt lucky to have been just in time in adding boxes to make more room before the colony swarmed.  This was documented in the 18 June 2014 post entitled, "Late Spring Update from the Homestead, Part III, Beekeeping."  As I took the hive apart this spring though, it was perfectly clear that the bees had built no additional comb in boxes three or four, none, since the end of the first week of June.  What happened I do not know.  Is this what "colony collapse disorder" looks like?  I cannot speak to that.  Regardless of the reason why, I do not think that two boxes would hold enough food stores to get the colony through the long Michigan winter.

I went 0 for 3 in 2014; three colonies installed, zero survived to spring of 2015.  The list of mistakes I made at colony install in 2014 is long.  In mid-May of 2015 I installed two new colonies, and benefiting from the failure documented here, and from additional research, it seems we are enjoying at least more early success than last year.

More will be posted on the 2015 grafting and bee installation in a future post.

Thank you for reading and commenting on the blog.  Your comments and criticisms, your inputs and acknowledgements, are welcomed, and will help me to improve my posts.

 Please "follow" the blog by clicking on "g+ Follow," or by e-mail at  "Follow by Email."   Also, "Like" us on Facebook at www.facebook.com/swmichiganhomestead.

-- John, 29 May 2015

[1] "Survival of Mallard Broods in South-Central North Dakota," http://digitalcommons.unl.edu/cgi/viewcontent.cgi?article=1050&context=usgsnpwrc, accessed 24 April, 2015
[2] "Wood Duck Broods in Dixie:  Striving to Survive Early Life," http://www.fwrc.msstate.edu/pubs/ducklings.pdf, accessed 24 April, 2015

Monday, August 11, 2014

Beekeeping: A Short, Cautionary Tale, From a Beginner

In recent weeks I have thought of the need to add a 5th box to the bee hive; I have been seeing many bees congregating at the hive entrance, and was worrying that they might have expanded to fill the available volume, and bee looking to swarm.  Since Nathan was around as an able assistant, having helped me to add the 3rd and 4th boxes back in June, the time to add the 5th box had come. After adding the 3rd and 4th boxes, I summarized the event in a blog post by stating, "The process of adding the boxes went more smoothly than I probably had any right to expect; it was executed without incident."  As it turns out, I indeed did not have any right to expect that it would go so smoothly.

Nathan and I assembled the necessary materials; the 5th hive box with top bars, a bee brush, the sugar-water spray, and a hive tool, suited up, and headed for the hive.  I took off the roof of the hive, leaving the quilt and 4 boxes sitting on the hive floor.  Nathan sprayed the bees at the entrance lightly with the sugar-water mixture.  I was worried about how heavy the hive would be.  When using a Langstroth hive, additional hive boxes are typically added above existing boxes, however with a Warré hive the new box(es) are added below the existing boxes.  Of course this requires that the existing boxes be lifted off of the floor to enable the addition of the new box(es).  And by now I expected those boxes to be full of comb and honey.  Keep in mind that honey is heavy, while water weighs 8.3 lbs. per gallon, honey weighs 12 lbs per gallon.  In the four existing boxes there could easily have been 80 to 100 lbs. of bees, comb, brood, and honey.  Of course the consequences of dropping the hive while attempting the move it, is not something I enjoy imagining.  Fortunately the hive did not seem to weigh more than 50 or 60 lbs., although my sense of the weight might have been off substantially, as I was more than a bit distracted.  No sooner had I lifted the hive off of the floor than the bees attacked with a vengeance.  With 50 or 60 lbs. of hive in my hands, I was unable to defend myself, or even to run for my life, so in short order I took four stings to the head and two to my right leg, but who's counting.  The bees were exceedingly unhappy with me, and would not let up in their defense of the colony.  Six of them made the ultimate sacrifice.  I went ahead, with great haste, and looked into box 4 to see if it was full of comb.  Box 4 was unexpectedly found to be empty of comb, so as quickly as prudence would allow, I replaced the hive on the floor, returning the colony to its original arrangement, without having added the 5th box.  After putting some distance between ourselves and the hive, Nathan and I discussed the need to put the roof back on the hive.  I thought it would be no problem, because with the quilt in place the hive is closed up, from the bees point of view.  I got within about 30 or 40 feet before they renewed their attack.  Discretion being the better part of valor, Nathan replaced the roof on the hive.

A reasonable person might ask, "well, dummy, how is it that you got stung with the bee suit on?"  And, that would be a great question.  The answer is that I did not properly don the bee suit, while Nathan did, and he escaped unscathed. In short, the top of my head was exposed, and there was another vulnerability in my preparations where the bee suit met my boots (see picture below).

I got lucky at the June install of boxes 3 and 4

The picture is from the June install of boxes 3 and 4, and it is exactly as I was also ill-prepared for the install of box 5.  If I had been wearing a hat, and if I had better secured my pant legs at my boots, I would not have been stung. Still, I was amazed at how quickly the bees found the gaps in my protection; it took only seconds, and very few of those.

By the time we got back the house Geri had two Benedryl capsules at the ready, and I took them immediately.  Then I asked her to get her tweezers, which she did, and she pulled four stingers out of my head, while Nathan pointed out where he had seen bees burrowing into my hair, and another two out of my right leg, just above my boot.  I do not know if pulling the stingers out is supposed to help, intuitively it seems like the right thing to do, but I do know that within a half hour I felt just fine.  Aside from a little itching, there has been no lasting discomfort.

All involved got a large dose of adrenalin for the day.  Which reminds me, we have stocked our medicine cabinet with two EpiPens to treat anaphylaxis if necessary (Epi is short for epinephrine, which is another word for adrenalin).  Obviously I am not allergic to bee stings, but we occasionally have guests who are, and it seems like a good idea for beekeepers to have EpiPens available.

Another lesson learned is that I need to find a mechanically advantaged method for lifting the hive off of the floor, it is simply too risky to be doing it by hand.  I could easily have panicked and dropped the hive boxes full of honey and bees.  I will be doing some research on how others are adding boxes to their Warré hives.  More generally speaking, it was yet another humbling reminder of how much I have to learn.

Did you know?  "...about 50 U.S. physicians report good results using <bee venom> to treat not only pain but arthritic conditions, multiple sclerosis, and other health woes."

Thank you for reading and commenting on the blog.  Your comments and criticisms, your inputs and acknowledgements, are welcomed, and will help me to improve my posts.

 Please "follow" the blog by clicking on "g+ Follow," or by e-mail at  "Follow by Email."   Also, "Like" us on Facebook at www.facebook.com/swmichiganhomestead.

-- John, 11 August 2014